Here's Jeremy's description of his creation, quoted from his Flickr page:
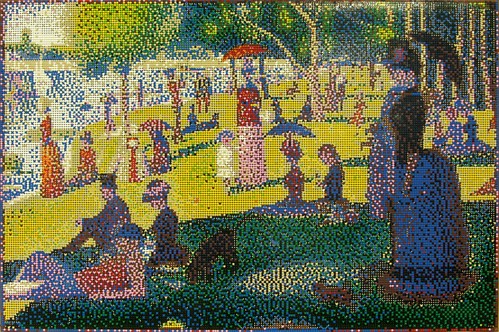
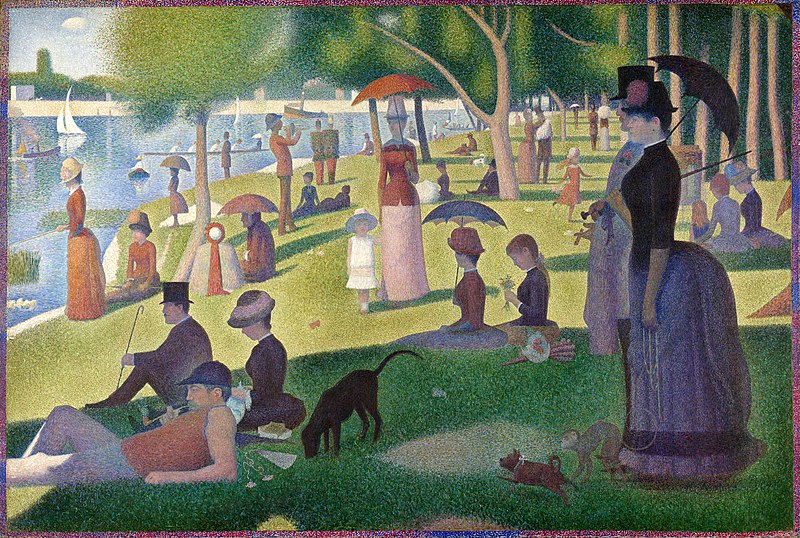
Based on the painting Sunday Afternoon on the Island of La Grande Jatte by Georges Seurat.
When I designed this mosaic, I wanted to capture the style and essence of the original painting as much as the image itself. Since Seurat used high-saturation colors in his painting, I omitted gray from the color palette. To achieve the pointillist appearance, I used round plates ("dots") instead of the standard square element. Behind the dots is another layer of color, which can be seen in the gaps between the dots.
I digitally designed the top layer first by reducing the original image to a palette representing all possible combinations of dot colors and background colors. I then designed the bottom layer as a sort of "correction" to make the mosaic closer to the actual color of the original. For instance, if a section of the original image is more "red" than the same section in my top layer design, the bottom layer element at that point will be red. The exact method requires taking into account that the dots are roughly 3.66 times the size of the gaps, so the bottom layer pixel at any location is:
4.54*(O - 0.78*D)
Where "O" is the RGB value representing the original image sampled at that (square) pixel and "D" is the average of the four neighboring pixels in the generated "Dots" layer.
As I tell the attendees of my "Build your own mosaic" workshop, designing mosaics is very much an art - the computer helps speed the process along, but the computer is not an artist. Mosaic artists need to experiment, and make changes where the computer gets it "wrong." This mosaic was no different. By the time I had finalized my design, I had completely scrapped over a dozen designs before it.
Other builders have made mosaics using "dots" placed directly on top of the stud below. What's different here is that I've placed each dot in the center of the group of four dots on the lower layer. Although this may seem an insignificant change, it has two major benefits. First, since the stud is visible between the dots, the background layer is closer to the front, resulting in less shadow, and thus higher visibility. Second, it means the pixels in the bottom layer are in different locations from the pixels in the top layer, so I can sample the original image at twice as many points, effectively doubling the resolution.
I spent about 80 hours to build this with help from some awesome volunteers at Brickworld who collectively contributed about another 40 hours to the project.
No comments:
Post a Comment